

Laminate flooring is known for its easy installation and durability, features that make it one of the best-selling floors. However, after several months or years of use, it isn’t unusual for unsightly gaps to appear on laminate flooring. Can or should you fix those gaps in your laminate flooring?
You can fix gaps in laminate flooring on your own, especially if the gaps are tiny and manageable. Poor installation, changes in humidity, and temperature all contribute towards the formation of gaps in laminate flooring. To fix large gaps, however, you might need to replace the problematic planks.
Still here? Awesome! Read on to learn proven ways to fix gaps in your laminate flooring and have it look good as new in no time.
How to Prevent the Formation of Gaps in Laminate Flooring


Allow the Laminate Flooring to Acclimatize for 2–3 Days
Failure to give the planks enough time to acclimatize to your home environment is a recipe for disaster. And to avoid unwanted outcomes such as gapping, peaking, and creaking, you’ll need to bring in the planks and allow them to sit undisturbed inside your home.
Carefully bring in the planks and allow them to sit for around two to three days (or even more). This ensures that by the time of installation, your wooden planks will be well acclimatized to elements such as temperature and humidity.
Check the Subflooring to Ensure It’s Level
Without a level subfloor, it’s practically impossible for your laminate flooring to align without forming gaps. As a result, it is advisable to counter check the level of the subfloor after every 3 feet to ensure that there aren’t any depressions or rises.
In case your subfloor isn’t level, you’ll need to fix it before installing your laminate flooring. If you’re knowledgeable about leveling subfloors, be sure to clean the surface up before applying a concrete leveler. However, if it’s your first time dealing with floor setups, reaching out to experienced professionals is recommended.
Hire a Flooring Specialist
While some DIY enthusiasts might argue against outsourcing to third parties, hiring an expert reduces the room for error. Of course, hiring experts doesn’t mean that your laminate floor won’t form gaps, peak, or even creak after a while; it only ensures that the job is well done.
When looking to hire specialists, it is advisable to hire from within your area. Doing so ensures that you outsource to an expert (s) who knows how to set up laminate flooring in houses with similar weather elements.
Although temperatures and humidity vary from home to home, hiring someone who has worked in similar setups will help you to capitalize on his or her experience, thereby avoiding mistakes that you could have made when flooring individually.
Using a Floor Gap Fixer to Fix Gaps in Laminate Flooring


A Floor Gap Fixer is a handy tool that’s designed to remove gaps in floating floors. Floor gap fixers are mostly rectangular, compact, and heavy enough to put slipped planks back in place.
The best time to fix gaps in laminate flooring is immediately you spot them. Below are steps you should observe to eliminate those unsightly gaps in your laminate floor using a floor gap fixer.
Peel Off the Protective Backing
Once you’ve purchased your floor gap fixer, you’ll need to remove the protective backing from the block’s adhesive face. Peeling the covering will give you access to the tacky rubber pad under the block. The tacky side is arguably the most important part of the floor gap fixer as it grips laminate planks, allowing you to move them until the gaps are eliminated.
Position the Block Strategically on the Displaced Planks
To successfully reposition your stray laminate planks, you’ll need to be extra careful with your positioning. As a rule of thumb, your block should always be 2.5cm (1 inch) from the end of a displaced plank to ensure that you have a good grip.
After holding the plank well in position, next is to move it in the direction of the gap. However, you should avoid removing the floor gap fixer once you’ve positioned it on the plank as persistent removal can reduce the adhesive pad’s strength.
Move the Laminate Plank Away From the Wall and Toward the Center
To avoid increasing gaps in your laminate flooring, it is advisable to move the problematic plank(s) towards the center. Please note that if you’re correcting more than a single plank in a row, you may need to move the neighboring planks to maintain spacing consistency and avoid worsening the gaps.
Use a Mallet to Tap the End of the Block
Before putting your mallet to use, it is advisable to steady your floor gap fixer. Hold the fixer carefully in position and hit the side furthest from the gap severally such that it moves closer to the plank it drifted from.
The idea is to hit the plank severally until the gap disappears. However, be careful not to whack the plank with excessive force as it might dislodge neighboring planks or even damage the underside of your flooring.
Once you’re done filling the gaps, it’s time to remove the floor gap fixer. Repeat the same process on other problematic planks to eliminate all gaps.
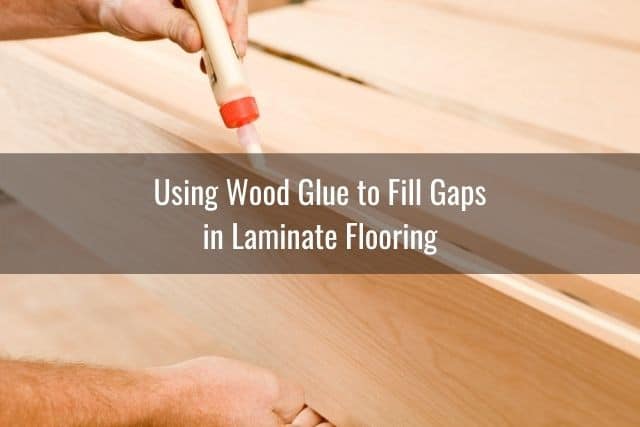
Using Wood Glue to Fill Gaps in Laminate Flooring

Select an Adhesive Wood Glue
To successfully fill the gaps in your laminate flooring, you’ll need to use high-quality wood glue. And since you’ll be bonding blocks of wood together, wood glue with better wood to wood bonding is preferred.
Gorilla Glue and Titebond III are among the most commonly used wood glues. However, for fixing laminate flooring gaps, the Titebond III is preferred as it bonds wood surfaces better than Gorilla glue. The High Viscosity Epoxy Glue is also a great option when looking for wood glue that can hold the laminate planks in place regardless of stress.
In case you aren’t a big fan of wood glue, you can also use wood putty or caulk to fill gaps in your laminate flooring. Point to note, though, you’ll need to have special applicators and additional equipment on standby when using these techniques.
Choose Reliable Utensils to Scoop Globs of Wood Glue
Wood glue is highly adhesive, meaning you won’t have much room for error once your glue has been laid down on the surface. Luckily, you don’t need a complicated set of equipment to apply wood glue on your laminate flooring. A toothpick or cotton swab is enough to get the job done. You can even use a disposable syringe to place the glue on the grooves where the laminate planks interlock.
Carefully Swab the Glue on the Displaced Plank’s Tongue
If you look inside the gap, you’ll spot a squared edge that’s meant to interlock the troublesome plank to another one in the row. Ensure that you apply a thick glue coating to the gap, aiming to cover the entirety of the squared edge.
It is advisable to apply enough glue in order to hold the planks in place. And to do so, you’ll need to swab in a generous amount of glue to avoid repeating the DIY gap-filling procedures after a few days.
Also, since wood glue sticks quickly, you’ll need to work fast and smart. Try your best to cover the bottom of the gap with enough glue for the subsequent steps to bear fruit.
Close the Gap by Pushing the Separated Planks Together
You can opt to use a floor gap fixer or your hands in this step. If you opt to use your hands, place them at an angle on the affected plank and guide it slowly towards its neighbor. Try as much as possible to use your full body weight for successful outcomes.
You can also use a floor gap fixer to give you that extra bit of edge when closing the gap. Once you’ve held the floor gap fixer in place, take the mallet and gently whack the plank towards its neighbor. Use the mallet repeatedly until gaps are no more.
Wipe Off the Excess Glue
Never use your hands to clean off wood glue, especially when using glues like Gorilla Glue that cannot be washed off hands. Although Titebond III is aliphatic and can clean up with water, it is still advisable to use a damp cloth to remove glue from your newly joined planks.
You’ll need to squeeze a damp cloth on the recently filled gap, removing excess glue until there isn’t any residue left. It is essential to carefully remove the excess glue as this will ensure the underfoot remains flat and in good condition.
In case you used wood putty or caulk to fill the gap in your flooring, sanding down might be essential once the fillers have dried up. It’s advisable to use 180-grit sandpaper or a higher value sandpaper to have the smoothest of finishes.
How to Maintain Laminate Flooring


Although affordable and easy to install, laminate floors require a considerable amount of effort to maintain. Below are ways to maintain your laminate floors and keep them looking good as new.
Don’t Allow Spills to Sit on the Laminate Floor
Laminate and water don’t get along too well. Due to this, you should always clean up spills immediately when they occur to prevent the moisture from seeping under the laminate, consequently causing gaps, lumps, and creaking noises.
To remove the spill, using a dry, soft cloth is recommended. Gently rub the cloth on the wet surface until the affected area is dry. You can also use a dry mop or vacuum cleaner to clear dust and dirt from your laminate floor.
Mop Your Laminate Floor Infrequently
Cleaning laminate flooring is different from other floor types, especially since laminate doesn’t work too well with water. Ideally, you should clean your laminate floor at least once or twice a month using a mop with a microfiber head.
Copyright protected content owner: ReadyToDIY.com and was initially posted on September 12, 2020.
High quality microfiber mops like the Turbo Mop Floor Cleaning System are ideal for washing laminate floors because they’re gentle enough. However, you should ensure the mop isn’t excessively wet (to the extent of dripping water) before using it to clean your floors.
Place Mats at Entry Points
Laminate floors are extremely sensitive to dirt. The grit from a dirty sole can scratch your floor, leaving it dull and unsightly. Due to this, it is advisable to place mats at several entry points to absorb dirt from shoes and feet.
If you are a pet parent, placing mats under your dog’s or cat’s feeding bowls is recommended since pets more often than not spill their food. Placing a thick mat beneath your pet’s feeding bowl will prevent spills from ruining your laminate floor. Since pets are likely to spill their wet food or water, it’s advisable to check the mat regularly to know if it’s time to take it outside to dry.
Use Protective Pads on Furniture
Seats, tables, and stools are notorious for scratching laminate floors. As a result, it is crucial to place protective pads on all your furniture’s feet to reduce the risk of scratches.
Besides placing protective pads on furniture, you should also handle all your furniture (especially the heavy ones) with care. Avoid dragging or pulling heavy furniture as they’ll scratch your laminate flooring, leaving it looking untidy and poorly maintained.
Be Wary of Weather
Laminate flooring needs minimum exposure to sunlight. Therefore, on days when the sun is too hot, leaving your curtains or blinds drawn is advisable since laminate floors tend to fade when exposed to direct sunlight.
Always Check the Manufacturer’s Instructions
In addition to checking for installation instructions, you should also check for maintenance tips or recommendations from the manufacturer. Checking for instructions will ensure that you understand the best way to care for your floor.
Avoid Wax or Polishes As They Rarely Work on Laminate Floors
Oil-based cleaners aren’t recommended on laminate floors as they can leave residue or streaks that damage the protective sealant on your laminate floor.
But if you must use a laminate cleaner, only buy cleaners that are labeled safe for use on laminate flooring. You should also spray the laminate cleaner on the microfiber cloth or mop as opposed to applying it directly on the floor.
Avoid Using Abrasive Tools on Laminate Flooring
Since laminate floors are extra sensitive, it’s crucial to remove candle wax, chewing gums, or other stains with utmost care. Do not use abrasive tools like steel wool or scouring powder to eliminate wax or chewing gum. Instead, use soft-bristle brooms or dust mops to clear debris.
Copyright article owner is ReadyToDiy.com for this article. This post was first published on September 12, 2020.
Benefits of Laminate Floors


Affordable
Laminate has become increasingly popular due to its affordability. With laminate flooring, you get a realistic hardwood or tile look at pocket-friendly prices. Laminate manufacturers often use affordable raw materials that are both durable and aesthetically appealing, making laminate floors a fantastic option that doesn’t break the bank.
Durable
Besides their unquestionable beauty, laminate floors are known for their durability. Laminate floors usually come with a tough exterior layer that holds up to dents, fading, stains, and scratches.
Easy to Maintain
Unlike other types of floors, you won’t need to spend too much effort (or money) to clean up laminate floors. All laminate floors from trusted manufacturers are designed to resist moisture and stain, making it easy to clean up after messes. You also don’t need to spend your hard-earned cash on varnishes or waxes to keep your laminate flooring looking neat.
Versatile
Laminate flooring comes in a host of attractive styles to suit your preferences. Since laminate is usually made from high-definition printers, you can get realistic designs to complement your interior décor. You can get laminate floors in a variety of textures, colors, and styles, making it perfect for interior-design enthusiasts.
Easy to Install and Repair
Most homeowners love laminate flooring due to its ease of installation. Laminate floors normally use tongue and groove locking systems that make it easy to install even without much experience. However, to avoid dealing with creaks and gaps, it’s best to outsource to an experienced professional.
In case of gaps, you can use a floor gap fixer to return the planks back to their original spaces.
Environmentally Friendly
Laminate is made from wood, meaning it can be recycled and reused with relative ease. The appearance of your laminate floor depends on your preferences. Therefore, in case you want to try out a new design, all you have to do is remove the planks and place them in a new location such as the garage or attic.
Final Thoughts
Gaps in laminate flooring tend to occur over time, especially in frequently accessed areas like the living room and kitchen. To avoid dealing with unsightly gaps, it’s advisable to fill the gaps immediately once you spot them.
You can fix the small gaps using a floor gap fixer, but be sure to clean it up after as this will keep the abrasive part strong enough for subsequent use.
Other alternatives are wood glue, caulk, or wood putty. Remember to remove the excess glue once you join two planks to leave the floor looking neat. For caulk, you might need to use sandpaper to smoothen up the surface.
Whichever option you prefer, it’s advisable to work with extra care to avoid damaging the highly sensitive planks. You should also avoid using an excessively wet mop or cloth to clean your floor as laminate is extra sensitive to moisture.
Related Articles


Laminate Floor Is Moving and Shifting: How to Fix It?
How to Install Carpet Without Tack Strips
Can You Lay Laminate on Laminate-Should You?
Can You Lay Hardwood Over Laminate Flooring?
ReadyToDIY is the owner of this article. This post was published on September 12, 2020.