Mortar, thinset, and mastic glue are all essential in many flooring projects. However, their strong adhesive nature can prove boisterous when renovating as you’ll contend with residual thinset on your plywood subflooring.
You can use several methods to remove grout and adhesive from your subfloors in time for renovating. Additionally, tools, such as scrapers, are ideal for scrubbing persistent glue stains, while power machines strip tougher tile grout from your wood subflooring.


So, read on as I explain practical glue removal techniques you can accomplish with the right tools and how you can remove the grout and sticky adhesive from your hardwood or plywood floor without scratches.
How To Remove Tile Grout/Adhesive From Wood Floor


A putty knife, sandpaper, steel wool, and brushes are tools you can use to remove the grout and cured adhesive stains on wooden floors. However, a hand tool comprising a tough blade and comfortable grip handle can significantly ease the workload.
I recommend the Grout Removal Tool. Unlike sandpaper, which is coarse throughout, the tool’s flat edge effectively scrapes grout and adhesive stains without scratching floor surfaces.
Step 1: Pour some lubricant, like distilled water or a hydrated vinegar solution, to scrub off stubborn adhesive marks easily. Besides making the wood surface easier to skim with the tool, it also counteracts the wet grout’s drying effects.
Step 2: Dampen the grout or glue with the solution.
Step 3: Let it seep in before chiseling, then use a hardwood cleaner and rouge sponge to remove residue.
Step 4: Spray some cleaner over the remaining patches and scrub gently to prevent scratches and making it easier to refinish if needed.
A grout removal tool is perfect for cleansing small grout or adhesive patches on wooden floors. For large surfaces, a scraper can be your best bet.
Removing Tile Grout/Adhesive With a Floor Scraper


If the grout coverage is extensive, the removal tool won’t suffice. For that purpose, a sizable scraper will provide sufficient leverage to lift grout pieces easily. I recommend the CO-Z Grout Adhesive Floor Scraper for this particular task. Its 6-inch-wide chisel effectively covers a wide area so that you don’t have to spend the whole day scraping.
Moreover, you get more support from its 40Cr steel handle, allowing you to exert less energy, which is useful against tougher epoxy grouts that require more force to remove.
Tip 1: When scraping, stick to one direction before moving onto the next section. Please note that haphazard strokes will only scratch the wood floor.
Tip 2: Keep an eye out for floor screws as they will hinder the scraper.
Tip 3: Analyze the blade’s sharpness, and resharpen, if needed, after prolonged use. This will increase the scrapper’s performance, allowing you to remove grout quicker.
Tip 4: Always start from a standing position and chisel grout away at an angle less than 45 degrees.
Tip 5: Use a handheld flat blade scraper to apply pressure and peel lingering glue.
Tip 6: Be careful when peeling chunks as it can strip off the wood coating. You’d want to repeatedly hack grout by driving the scraper back and forth till the tile adhesive gives way.
If you’re dealing with long grout lines, a high-speed angle grinder can effectively chip off tougher grout patches, especially in large rooms or spaces.
Removing Tile Grout/Adhesive With an Angle Grinder
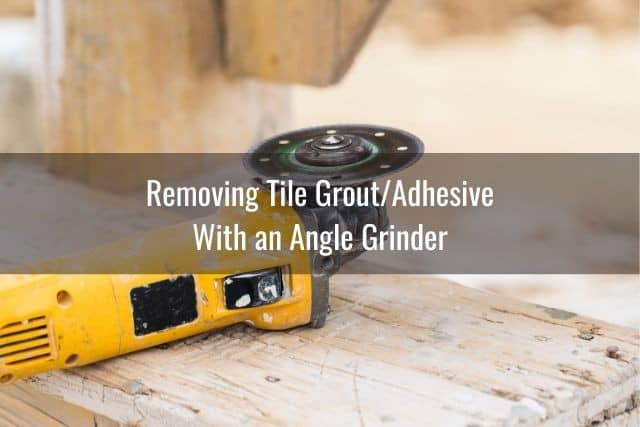

Rotary tools are an exemplary grout removal option. Aside from being faster than scrapers or hand tools, their powerful motors can easily groove off unsanded, sanded, and epoxy grout.
If you don’t have an angle grinder, you can rent or purchase one from Amazon. I recommend DEWALT Angle Grinder as its anti-vibe handle limits vibrations, allowing better control and preventing chipping the floor.
Furthermore, it comes with a dust ejection system, preventing concrete particles from damaging the motor. I like to pair the grinder with a sturdy wheel, such as the Concord Blades Diamond Cup Wheel, which is suited for stone and masonry surfaces. It works well on sanding tile adhesive from plywood seams without abrasions.
You can decide to switch to the 10-inch wheel if space permits, but I find the 7-inch variant optimal for most floor spaces. Be sure to equip your safety goggles and mask as it gets quite dusty. You could attach a dust collection system to your grinder, but it works just as well without it. That is if you plan on cleaning up anyway.
Step 1: Align the grinder flat onto the floor surface so that the wheel is parallel to the ground.
Step 2: Power up the grinder and hover the blade about 1/4 to 1/2 inch into the grout.
Step 3: Now gently sweep across the floor in circular motions to remove grout faster than moving in straight lines.
Step 4: For longer cuts, click the locking mechanism trigger to position the blade in place.
Step 5: Ensure you move in slow strides to prevent the blade from skipping.
Step 6: Residual chunks can be alleviated with a scouring pad and diluted vinegar.
Step 7: If stains persist, let the grout absorb the solution and try again. This will make it softer, allowing you to remove it with ease.
How To Remove Ceramic Tile Glue From Wood Floor


Ceramic tile glue can peel off with water if it’s bonded with mastic adhesive. However, if it’s solid mortar or waterproof glue, then you’ll need to rely on tools such as a jackhammer to get the job done.
Removing Ceramic Tile Glue With Water
Mastic is a non-water-resistant organic ceramic glue. Water can dissolve the adhesive, but you’d want to limit the amount to prevent rot damage.
Step 1: Wet the area with a towel and let it lie on the mastic glue for a few hours. The moisture will seep into the adhesive, causing it to soften.
Step 2: Use a cloth or finger to peel off the softened glue from your wooden floor.
Step 3: For unsaturated glue chunks, either apply more water or chip off with pressure using a hammer and chisel.
Step 4: Make sure to position the chisel at 25° to 30° before hammering to prevent you from digging across the wood.
Removing Ceramic Tile Glue With Chemical Products
Petroleum refined solvent removers dissolve mastic glue quicker than distilled water. When using a chemical remover, protect sensitive areas, such as walls, cracks, and drains, with a plastic sheet or a cloth rug. Then pour the product over the glue and scrub.
Scrappers, stripper pads, sponges, and bristle brushes, like an old toothbrush, can easily deteriorate the adhesive, leaving a clean and untampered wooden floor. Be sure to ventilate and clean the room after. This solution is only feasible for thin ceramic glue, such as mastic. If you’re dealing with water-resistant adhesives like thinset, you’ll need an electric chisel.
Removing Ceramic Tile Glue With Electric Chisel/Jackhammer
Conventional chisel and hammers are not powerful against thinset adhesive. When dry, the ceramic glue forms a strong bond with the ground. The vibrations of a powered chisel or jackhammer weaken solidified molecules, making it easier to hack dried mortar chunks.
For that reason, I recommend the Xtremepower DemolitionJack hammer, featuring a powerful 2200 W motor and carbon steel scraping chisels to break strong thinset chunks.
Like with most power tools, gear up with essential safety equipment such as:
- Glasses
- Gloves
- Dust Masks
- Boots
To remove ceramic tiles using power tools:
Step 1: Place the power tool at 45 degrees on the thinset surface and move the blade forward.
Step 2: Move slowly in small sections of at least 1 to 2 feet until the wood floor is grout-free.
Step 3: Tilt your jackhammer at a slightly lower angle for tougher pieces but avoid going too low as you can scratch the floor.
Step 4: After successful removal, place all the pieces into a bin to prevent scraping your floor.
How To Remove Floor Glue From Wood


Urethane and water-based floor glues can be removed with chemicals, sanding, or a putty knife. Compared to mortar, floor glue isn’t much of a challenge to clean up. The main issue arises when dealing with raw wood flooring, so you need to be extra careful with your chosen method.
Removing Floor Glue With Acetone
Propanone, aka Acetone, is a simple yet effective floor glue DIY solution. It’s an efficient option when dealing with small patches of floor glue. All you will need are the following:
- Cotton swab or rug
- Brush
- A bottle of nail polish remover
Douse your cotton in acetone and rub it against the glue patch. You want to make sure you let it rest for about 15 minutes and sprinkle some water. This will prevent acetone from evaporating too quickly. Using a brush or rag, rub the area until the glue peels off. Repeat by applying more pressure for stubborn floor glue.
Removing Floor Glue With Mineral Spirit
Scraping off years of dried floor glue can be a challenge. A mineral spirit or white spirit is a superb option for stained hardwood floors. It also works exceptionally well against urethane hardwood floor adhesive and preserves the quality of your floor.
To get started, you’ll need a heat source, like a heat gun or hair dryer, as glue deteriorates in high temperatures.
Step 1: Equip your mask as fumes can be bad for inhalation.
Step 2: Next, begin to warm up the floor glue for roughly 5 minutes till soft.
Step 3: Peel off the softened glue using a cloth.
Step 4: Pour on some mineral oil and rub any residue.
Step 5: Repeat until all glue is removed from your wood floor.
Alternatively, if you’re left with some tedious chunks, your next option may be to sand it down.
Removing Floor Glue via Sanding
Sanding should be a backup option if acetone or mineral spirit isn’t working. For this process, you want to stick to a suitable grit respective of the wood type and adhesive. Fine sandpaper is ideal for planed wood, while 36-grit sandpaper works best for coarse maple floors.
Step 1: Select your sandpaper grit and fold it in half.
Step 2: Gently scrub the adhesive in circular motions.
Step 3: Clear removed glue away from the site.
Step 4: If stain persists, apply some pressure or renew the sandpaper.
Step 5: Periodically, check the site and continue till glue peels off.
Removing Floor Glue With Industrial Adhesive Cleaners
Chemical reagents are another method of removing floor glue. They are specifically designed to deteriorate glue so that it’s easier to peel from wooden surfaces. I recommend products such as Goo Gone Adhesive Remover as it is effective in eradicating glue from wood floors and furniture.
Step 1: Spray Goo Gone onto the floor glue.
Step 2: Allow the formula to soak for five minutes.
Copyright protected content owner: ReadyToDIY.com and was initially posted on March 7, 2021.
Step 3: Use a brush or putty knife to dig out adhesive chunks from your floor surface.
Step 4: Repeat until all glue comes off.
Step 5: Wipe the area with soap and water.
Word of caution: When choosing an adhesive remover, bear in mind its harshness and compatibility with your specific wood floor. Be careful as some chemicals could end up bleaching it while removing the glue. If in doubt, consult with a professional to understand which options are suitable.
What Dissolves Tile Adhesive?
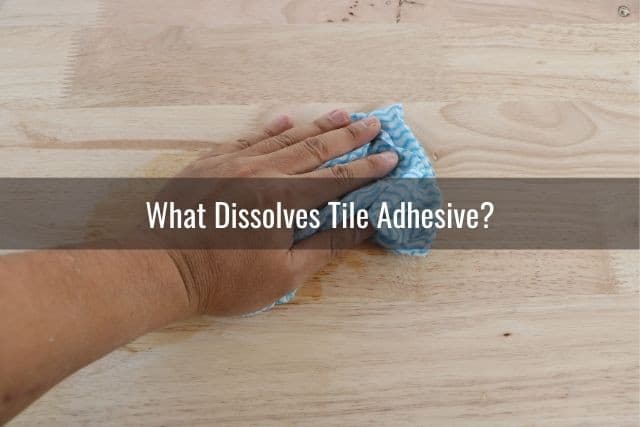

Substances such as mineral spirits, industrial glue removers, paint thinners, acetone, and vinegar are great solvents. However, the difference in potency varies with each chemical. Options such as industrial chemical removers and acetone work quicker on water-resistant tile adhesives than DIY alternatives, like vinegar.
Natural adhesives, such as mastic, will degrade effortlessly with simple vinegar or distilled water. However, tougher materials, like epoxy and thinset, require concentrated industrial adhesive removers to deteriorate fully.
These synthetic adhesive removers comprise sulfur and chloride salts protonated into strong acids from their dioxide state. It’s these acidic elements that make it possible to dissolve tile adhesive by breaking down its molecules.
How To Remove Dry Tile Adhesive


Dry tile adhesive can be removed with some brute force, using a hammer and chisel or power tool. Once hardened, the glue solidifies like concrete, making it difficult to remove with ordinary sandpaper. So, chipping it piece by piece is the best method of removal.
Depending on the surface area, a chisel can prove sufficient to get the job done. Just work on small sections before moving on to larger spaces. Ideally, you’d want to hammer the chisel directly onto the dry adhesive. Once hammered in, jiggle the chisel until the adhesive breaks off.
If you’re working on a wide space, a rented electric hammer can cut costs and chip off dry tile adhesive effectively than spending your time with a chisel. Other efficient power tools include air hammers, floor grinders, and angle grinders.
How To Remove Stick on Tile Adhesive From Wood Floor


Stick-on tile glues with an excellent grab, such as Vinyl Composition Tile (VCT) adhesive, can be highly irritating to remove with conventional blades and brushes. The best method of eradicating residual stick on tile adhesive is by using contact adhesive removers.
They work by softening the sticky substance so that it’s easier to wipe away. I recommend the 3M General Purpose Cleaner, which deals with sticky glue substances. Its potent chemicals easily strip off old stick-on tile glue and can be used on painted surfaces and wood subfloors without staining it. Products like Varsol solvent and paint thinner achieve the same results if you’re looking for a cheaper way to protect your floor’s alkyd and varnish coating.
Step 1: Moisten a towel with hot water and let it dampen the glue for twenty minutes. The heat will soften the glue, making it easier for chemical removers to work.
Step 2: Blot some adhesive remover or thinner onto the stick on tile glue directly.
Step 3: Let it sit for at least two minutes, then scrape off with a putty knife or razor. The fumes emitted are carcinogenic, so wear a mask and ventilate the room.
Step 4: Add more remover if the glue still sticks and let it sit for another two minutes or so.
Step 5: If it persists, you can sand it down with a suitable grit level.
Step 6: Ensure to clean the remaining area and let it air out for a few days.
Will Peel and Stick Tiles Ruin Hardwood Floors?


Yes, especially when you decide to remove the tiles in the future. Though the damage may not be extensive, you may scratch your hardwood floor during the process. For good measure, always cover up your hardwood floor with a one-quarter-inch plywood substrate layer. Aside from creating a secure surface, a substrate layer makes it easier to stack the tiles without ruining your floor with adhesive.
How To Remove Floor Tile Adhesive From Plywood


A simple scrapper and water are more than enough to remove tile adhesive from plywood. This is because plywood texture is seamless and smooth, allowing your knife or scraper to glide through without abrasions. Water or a lubricant helps reduce friction, thus minimizing scratches.
Copyright article owner is ReadyToDiy.com for this article. This post was first published on March 7, 2021.
I recommend using the 5 in 1 Multi Tool Paint Remover, which acts as a putty knife, scraper, and paint remover. Always opt for a water displacement lubricant as it helps prevent bulges and abrasions on plywood, especially when you’re looking at installing a new floor.
Related Articles
How To Remove Old Tile Adhesive From Concrete
Can I Lay Tile Over Painted Concrete Floor?
How to Make My Hardwood Floors (Less or More) Slippery?
Can You Put Vinyl Tile On Wood Floor?
ReadyToDIY is the owner of this article. This post was published on March 7, 2021.
Can You/Should You Tile Over Old Floor Adhesive? (How To Remove)