
Wood-look trends with white risers are all the rage right now, making vinyl plank flooring a viable option for stairs, which also comes in a variety of colors for great looks. The material offers a comfortable feel underfoot and features a wide range of high-quality, beautiful finishes. It’s also low-maintenance, water-resistant, and cost-effective.
To install vinyl plank flooring on stairs, you first need to prepare the stairs. Next, ensure that the underlayment is perfect to avoid lumps. Install the bottom riser and cut out the vinyl. Depending on your product, glue down or stick, press, and eliminate all bubbles.
Homeowners want to update the landing on their stairs and install vinyl plank flooring to give their home a freshness or match with the rest. If you are thinking of doing a DIY, read on.
Can You Install Vinyl Plank Flooring on Stairs?


You can install Vinyl planks on your stairs. Vinyl planks are strong, create a beautiful aesthetic, and are less expensive than natural wood. If you have kids or a pet owner, we recommend this flooring type because it’s firm and comfortable on the feet and doesn’t cause too much noise.
Vinyl planks are DIY friendly and will save you some money as long as you carefully follow the detailed instructions.
How Much Does Vinyl Plank Cost?


The cost will depend on the choice of your vinyl and the type of installation. If you’re doing a floating structure, it may cost you around $2-$5 per square foot.
When installing vinyl planks on stairs, choose a brand that sells a stair nose, the part that goes on the edge of each step, to coordinate with your flooring choice.
Should You Install Vinyl Plank Flooring on Your Stairs?


Many homeowners prefer vinyl planks on their stairs because they are DIY friendly and easy to lay since they are smaller. Before you install vinyl on your stairs, it’s essential that you are familiar with the types of vinyl and which is more suitable for you.
Types of Vinyl
With various options, it’s not easy to settle on the perfect vinyl tile. Vinyl is available in three varieties. Here they are and what they entail:
- Vinyl Planks – Planks resemble hardwood floors and come fabricated long planks; they mimic specific wood types from oak to hickory. Planks feature tongue and groove systems to lock together and create a floor.
- Sheet Vinyl – Sheet vinyl comes in enormous continuous flexible sheets that are entirely waterproof. Homeowners use it as an alternative to natural stone, ceramic tiles, or hardwood in rooms like the laundry area, bedrooms, etc., but are rarely used on stairs. However, it’s the most economical type of vinyl.
- Vinyl Tile – Vinyl tile flooring is decorative and sturdy. It features different patterns and colors with peel-and-stick or interlocking installation techniques. Luxury vinyl tiles are thicker, include multiple layers, and sometimes a textured surface making them more durable than vinyl tiles. Read about Can Put Vinyl Tiles on Stairs.
Which Vinyl Is Better for Stairs?


Each kind of these vinyl types come with different features with varying methods of installation. Before you decide what flooring you want for your stairs, find out if the vinyl material will match your needs.
Copyright article owner is ReadyToDiy.com for this article. This post was first published on September 21, 2020.
Conversely, each type comes with pros and cons, but in our opinion, vinyl plank flooring is a better option for stairs than a vinyl sheet or vinyl tile. It’s also waterproof and includes a scratch-resistant wear layer.
Here are the pros of using vinyl planks on the stairs:
- Inexpensive
- Easy to clean
- Easy to install with no hammering or sawing
- DIY friendly
- Beautiful and unique with stone, marble, and hardwood effects
- Comfortable
Since thickness and material construction determine the quality, the main disadvantage of vinyl prank is that the quality varies even with top-rated brands. Also, older vinyl floors included asbestos material that is harmful and can cause severe diseases like cancer.
Therefore, if you want to replace an old vinyl floor, you need to find out if they have asbestos. For safety, hire a professional to test for any toxic flooring before replacement. Also, ensure that you steer clear of any abrasive scrubs, ammonia, scouring pads, solvents, and other agents that can damage the vinyl planks.
Most vinyl planks feature a thickness of between 2-8mm. Thin vinyl is prone to damage and indentation, while thicker and heavier planks offer cushioning and stability, especially in high traffic areas like stairs. Heavy-duty planks act more like wood and feature a waterproof PVC that repels water making it durable.
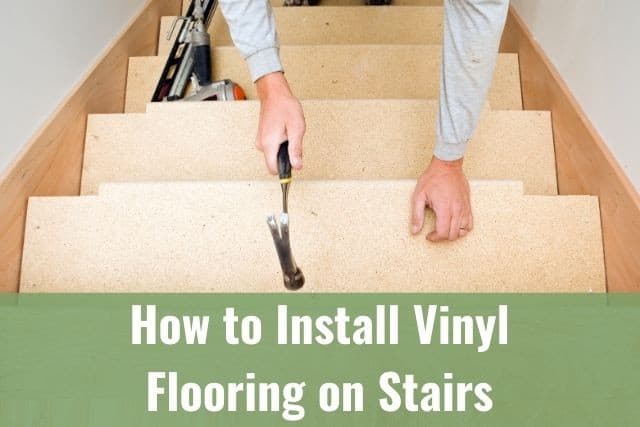
Prepare the Subfloor For Vinyl Planks


Before you install vinyl planks, you need to prepare the stairs and make sure that the subfloor and underlayment are perfectly level to avoid bumps. If there are any overhangs, remove them using a jigsaw and choose a raiser material with the same thickness as the overhang to accommodate the stair nose.
Remove any existing molding material and cut back the baseboard to accommodate the stair nose. While it doesn’t need any special prepping, the floor should be leveled with no debris or particles, as it will show when the vinyl is fitted.
However, if installing the first time, level, and smooth out the underlayment, remove any dust and particles caught up under the floor. Remove any carpeting, tack strips, old adhesive, or any material that’s in your way.
Also, at the top of the stair, cut back the wall baseboard to create room for the nosing. It’s best to install from the bottom of the staircase as you go to the top ones for a cleaner overall appearance.
You will need the following:
- Construction adhesive
- Caulk gun
- Jigsaw
- 80 teeth blade
- Screws and nails
- Tape measure
Prepare the Vinyl Planks


Measure and Cut the Bottom Riser to get the height and length. Ensure that you measure all the stairs as they could have a slight difference. Transfer the measurements to the vinyl plank and cut using a blade to ensure clean cut planks to fit your stairs’ corners.
This step is essential because you don’t want to end up with inaccurate measurements. It is tiresome and might cause you a few losses.
Install the Bottom Riser For Vinyl Planks


Using construction adhesive, evenly spread it on the bottom riser with a caulk gun and lay it down in place. Caulking seals any joints and covers screws that sit beneath the surface. Drive a screw or nail on the corner to secure it along the bottom and top edges.
If your product is peel and stick, peel the vinyl plank’s protective sheet to reveal the adhesive and lay it down on the flooring. Otherwise, glue-down, and ensure that you press it against the floor working outwards to ensure no bubbles for perfect installation.
Measure and Cut the Tread on Vinyl Planks


Measure the corners with a set square and ensure they are 90 degrees and transfer the measurement to a plank. It would be best if you had the tongue and the groove to connect to the adjacent plank and nosing. Therefore, ensure that you measure the stair depth and minus the gap you need for the nosing.
Dry-Fit the Nosing and the Tread


If you’re using two planks, snap them together and set the tread in place. Cut the nosing and put it in place on the edge of the staircase. It should overlap or snap on to fit then remove for gluing.
Install the Stair Nose


There are two types of nosing, those that sit directly on the subfloor and snap into the tread and those that require installation using a shim material.
If you’re using the former, don’t use fasteners on the tread. Instead, decouple from the nosing to expand and contract independently. If using the latter, glue the shim in place, apply glue on the nosing, set in place, and fasten with screw or nail.
Final Thoughts
Are vinyl planks suitable for stairs? Vinyl planks offer harmonious and beautiful décor on your landing to create a unique stone, hardwood, or marble look. If you want to coordinate your stairs and floor, the different designs ensure you add flair to your stairs.
Vinyl planks are versatile, functional, and affordable, making them a favorite for most homeowners. They are convenient and easy to use if you like executing your own do it yourself projects. However, some models may not offer high-quality material construction and can emit harmful smells. Therefore, consult a professional before buying.
Check out our Vinyl Plank Flooring Project Estimator to estimate your project.
Related Articles


Can You or Should You Fix Gaps in Vinyl Plank Flooring?
Can You/Should You Fix Vinyl Plank Flooring Gaps?
Can You Put Vinyl Planks Outside?
Can You Remove and Reuse Vinyl Plank Flooring?
ReadyToDIY is the owner of this article. This post was published on September 21, 2020.